Pterodactyl is an open-source game server management panel that provides a user-friendly interface for managing game servers. It allows server administrators to easily manage multiple game servers, monitor performance, and configure various settings. Pterodactyl offers a range of features such as server allocation, resource management, scheduling, and user management.
Wings, on the other hand, is the software component responsible for running and managing the game server processes. It acts as a daemon or service that runs on the server itself. Wings is responsible for starting, stopping, and managing the game server instances based on the configurations set in the Panel. It handles the communication between the Panel and the actual game servers, ensuring smooth operation and efficient resource utilization.
System Configuration
If you are looking to install Pterodactyl Panel and Wings on a specific hosting provider and system configuration, here are the details of the system we will be using for today’s installation:
Hosting Provider: Zap-Hosting
Product: Linux Rootserver
Specifications
Processor: Intel Xeon E5-2650v2
RAM: 8GB
Storage: 60GB SSD
Operating System: Debian 10
If you are interested in purchasing a similar system or exploring the hosting provider mentioned above, you can find more information and the purchase link at: Purchase Link
You have the flexibility to choose any hosting provider for your Pterodactyl installation. However, it is recommended to avoid purchasing a VPS (Virtual Private Server) and instead opt for a Linux root server.
Updating the Operating System
Before you begin, it’s important to update your system packages to ensure you have the latest updates and security patches. Run the following commands:
- Use the
apt updatecommand to get updates. - Use the
apt upgradecommand to upgrade.
Installing dependencies
Install the required dependencies for running the Pterodactyl panel script.
- Run
apt install curlto install curl. - Run
apt install sudoto install sudo.
Installing Panel with Script
Install the required dependencies for running the Pterodactyl panel script.
1. Execute the following command to download and run the installation script
bash <(curl -s https://pterodactyl-installer.se)
2. After running the installation command, you will be presented with the following options:
– 0: Install the Pterodactyl panel.
– 1: Install Wings.
– 2: Install both the panel and Wings.
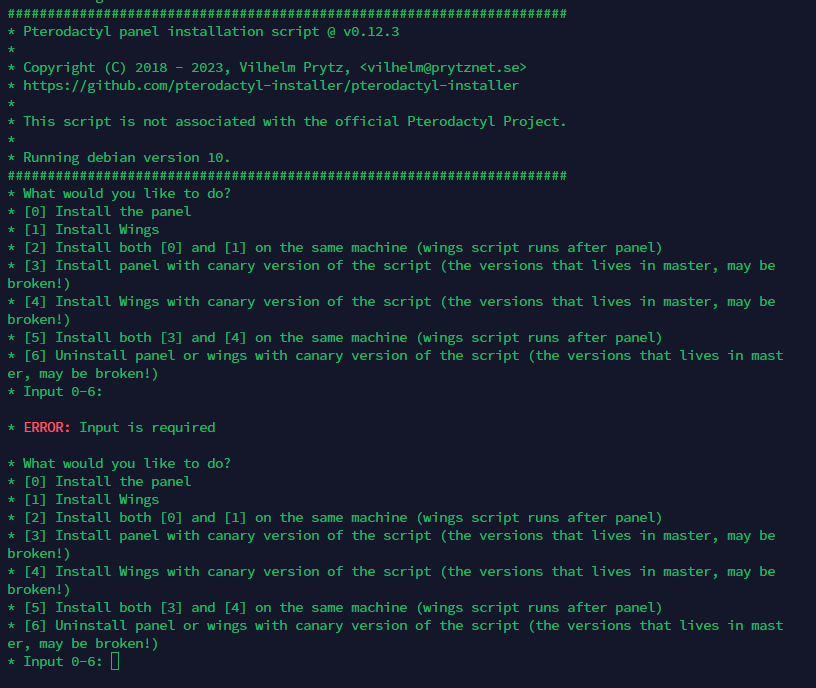
In our case, since we want to install both the panel and Wings on the same machine, you should enter ‘2’ and press Enter.
3. Provide database configuration
In my case I am leaving database name, username and password black as it will pick default/autogenerated details.

4. Enter the Fully Qualified Domain Name (FQDN) or the IP Address that you will use to access the panel. If you have a domain name associated with your server, enter that. Otherwise, enter the IP address.
For the next option, type ‘n’ and press Enter. This is because we don’t want to automatically configure the Uncomplicated Firewall (UFW).

5. Verify the details and press y to continue installation.
6. (Optional) Press Enter if you want to send anonymous telemetry data, or type ‘no’ and press Enter if you do not wish to send telemetry data.
This step allows you to choose whether you want to participate in anonymous data collection for improving the Pterodactyl project. Pressing Enter will indicate your consent to send the telemetry data, while typing ‘no’ and pressing Enter will opt you out of the data collection.
7. After the Panel installation completes, you will receive a message indicating the completion.
At this point, you will be prompted to proceed with the installation of Wings. To proceed, type ‘Y’ and press Enter.

8. Next, the installation script will prompt you for the Wings configuration. Follow these instructions:
- Press ‘N’ to indicate that you do not want to automatically configure the firewall.
- Press ‘Y’ to automatically configure a user for the database host.
- Press ‘Y’ to configure MySQL to be accessed externally.
- Leave the panel address blank (simply press Enter).
- Provide a database username and password. It is important to save this information for future reference.
- Press ‘N’ to indicate that you don’t want to configure HTTPS.

9. After the Wings installation completes, you will receive a message indicating the completion.

Panel & Wings Configuration
After successfully installing the Panel and Wings components, the next step is to configure them. Follow the steps below:
Login with the Username/Password which you had entered during installation.

2. On the top right corner of the Pterodactyl Panel, you will find an option labeled “Admin.” Click on the “Admin” option to access the admin panel.
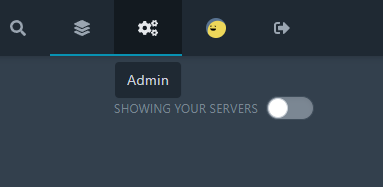
3. In the admin panel, look for a navigation menu on the left side. Scroll down and find the “Locations” option and add a new location code.

4. On the left side of the Pterodactyl Panel, click on the “Nodes” option in the navigation menu and click there.
Click on the option to create a new node.
Fill in the following basic details for the new node:
- Name: Enter a name for the node.
- Location: Select the location you have just created from the available options.
- Node Visibility: Set it to “Public.”
- FQDN (Fully Qualified Domain Name): Write the IP address of your Wings installation. In this case, as the panel and Wings are installed on the same machine, use the IP address of the panel.
- Communicate Over SSL: Select “Use HTTP” as SSL cannot be used with an IP address.
- Behind Proxy: Click on “Not behind proxy” since you are not using any proxy like Cloudflare.

5. In the node configuration:
Total Memory: Enter the total RAM of your machine. Since you have installed the Panel and Wings on the same machine and want to allocate some RAM to the Panel only, you can specify the amount. For example, if your machine has 8GB of RAM, you can allocate 5000 MB (approximately 5GB) to the Panel.
Memory Over-Allocation: Set it to 0%. This ensures that the allocated memory for the Panel does not exceed the specified total memory.
Total Disk Space: Enter the total storage capacity of your machine. If your machine has 60GB of disk space, you can enter 55000 MB (approximately 55GB) as the total disk space.
Disk Over-Allocation: Set it to 0%. This ensures that the allocated disk space for the Panel does not exceed the specified total disk space.
At last click on Create Note.

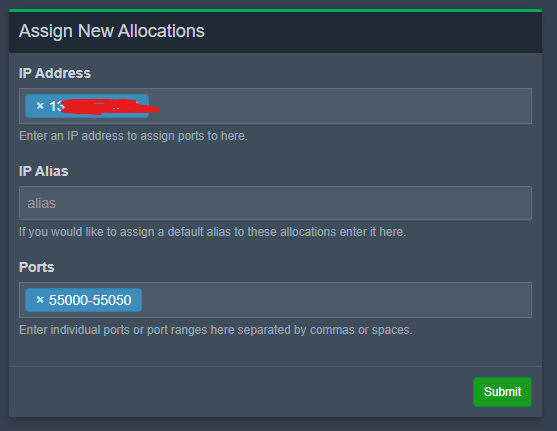
6. After configuring the node, you will be automatically redirected to the Allocation settings. Here’s what you need to do:
IP Address: Write the IP address of your Wings installation. This is the IP address associated with the machine where Wings is running.
IP Alias: If you want to assign an additional IP alias to the node, you can enter it here. Otherwise, leave it blank.
Ports: Specify the range of ports you want to allocate for server usage. For example, if you want to assign 50 ports, you can use the range 55000-55050. This means the servers running on this node will have access to ports from 55000 to 55050 for communication and connections.
Press Submit
7. On the Node Configuration page in the Pterodactyl Panel, locate the section or tab labeled “Auto-Deploy” and click on Click on the “Generate Token” option to generate a new token for auto-deployment.


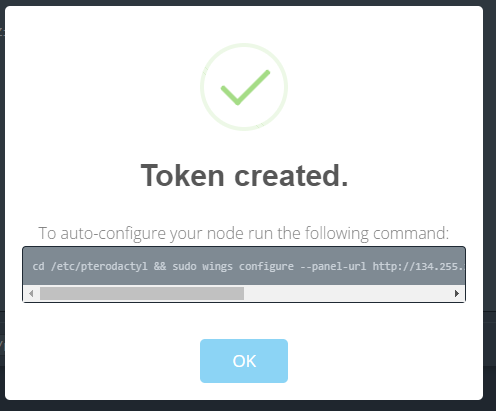
8. Copy the token from the Pterodactyl Panel and paste it directly into your Linux CLI. The token is part of a command that will facilitate the automatic connection between the Panel and Wings components.

9. Start the Wings service, you can use the following command in your Linux CLI:systemctl start wings
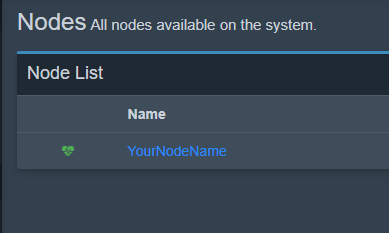
10. In the nodes list, you will notice a green heart icon displayed next to the node you have created. This green heart indicates that the node is now connected and successfully communicating with the Pterodactyl Panel.
Database Configuration
Now, we will proceed with configuring the Pterodactyl Panel database, which will enable us to generate a database when creating a server.
1. Within the admin panel, navigate to the “Databases” section and then click on create new.

2. To configure the Pterodactyl Panel database, provide the following necessary details:
- Name: Enter a name for the database. This can be any descriptive name you choose.
- Description (optional): If desired, you can provide a description for the database to add additional context or information.
- Host: Write the IP address of the machine where your database is hosted. In this case, as you have installed the database on Wings, you will add the IP address of Wings.
- Username: Write the username that you created during the Wings configuration process.
- Password: Write the password that you created during the Wings configuration process.

Congratulations! You have successfully completed the installation of the Pterodactyl Panel along with the Wings component. You have configured the necessary settings, connected the Panel and Wings, and set up the database for server generation.
At this point, you can proceed with managing your servers, creating new nodes, allocating resources, and utilizing the powerful features offered by the Pterodactyl Panel.
If you have any questions or encounter any issues during your usage of the panel, feel free to seek assistance. Happy server management!


